
God Bless America!
N1NKM's |
|---|
120VAC LED spotlight (Click to see the 12VDC version) |
THIS PUPPY IS BRIGHT!
| Completed Power LED unit |
|---|
 |
| N1NKM's |
|---|
120VAC LED spotlight (Click to see the 12VDC version) |
| Completed Power LED unit |
|---|
|
I don't remember the brand name, but these night lights use a circuit that is self current-limiting. Thus, it can power a string of any number of LED's from 1 to 40! (The night lights use ONE LED. I modified several of them to use TWO, and one unit in the hallway now uses FOUR!) This circuit is quite ingenious, in that it uses a .68 capacitor as a voltage dropping element. This also serves to limit the current to about 12ma into one LED, and 8ma into this string of 36. Why 36? Because it comes out to 104v, and it's an even number. :) Plus, I had already assembled this array, and didn't want to modify it further.
| Schematic |
|---|
 |
This circuit is great, because the .68u cap limits the current, and it does NOT get warm like a resistor would. This unit sends <12ma to the LED array, and it is more than bright enough! It appears to be at least as bright as a 25 watt spotlight. That's actually pretty bright! It's only drawing about .8 watt from the AC line, but it is a very non-linear load! (It draws brief pulses of current.) My "Kill-a-Watt" meter could not measure it! I calculated the power by measureing the I and V of the LED array, which is 8ma at 104v.
If you want to decrease the current, replace the .68u cap with a smaller value. More current, use a larger value, NOT TO EXCEED 1ufd! You do NOT want to give these LED's more than 15ma! They will "burn out" very quickly if they are over-driven, even by a small amount. You don't want them getting warm!
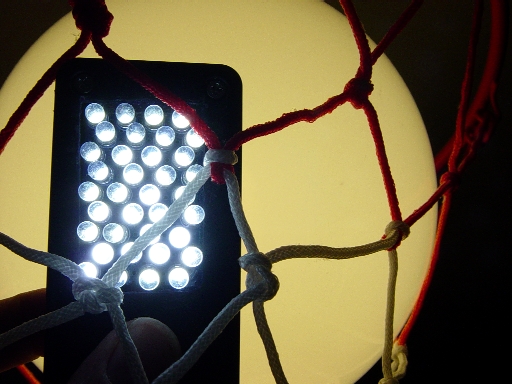
Note about these LED's: They were obtained by my former employer in bulk from China, so I don't have a Mfg or Part #, sorry. :( They are rated at 20ma MAX, but you don't want to run them anywhere near that! Even at a measly 8ma, they are MUCH too bright to look at! (See pic, below!)
At 10', the light from this array is enough to comfortably read by! If you give one of these LED's only 0.1 ma, it will be about as bright as a "standard" LED indicator! That is not a typo! 1/10'th of a milliamp makes it bright enough to use as an indicator. You can thus use them as power indicators for battery-powered 9~12v devices with a 100k resistor! Give the LED 1ma, and it's bright enough to use for a small flashlight that will last "forever" with 3 AA cells and a resistor! These LED's have a 2.8v drop, so although it's possible to run them on just 2 AA cells, they will "dim out" VERY quickly as the battery voltage drops. Thus, you want to use 3 cells, with a current-limiting resistor to make reliable flashlights. Power the LED with just 5ma, and it is PLENTY to see by!
| LED light with a 100 watt globe light, behind it! |
|---|
 |
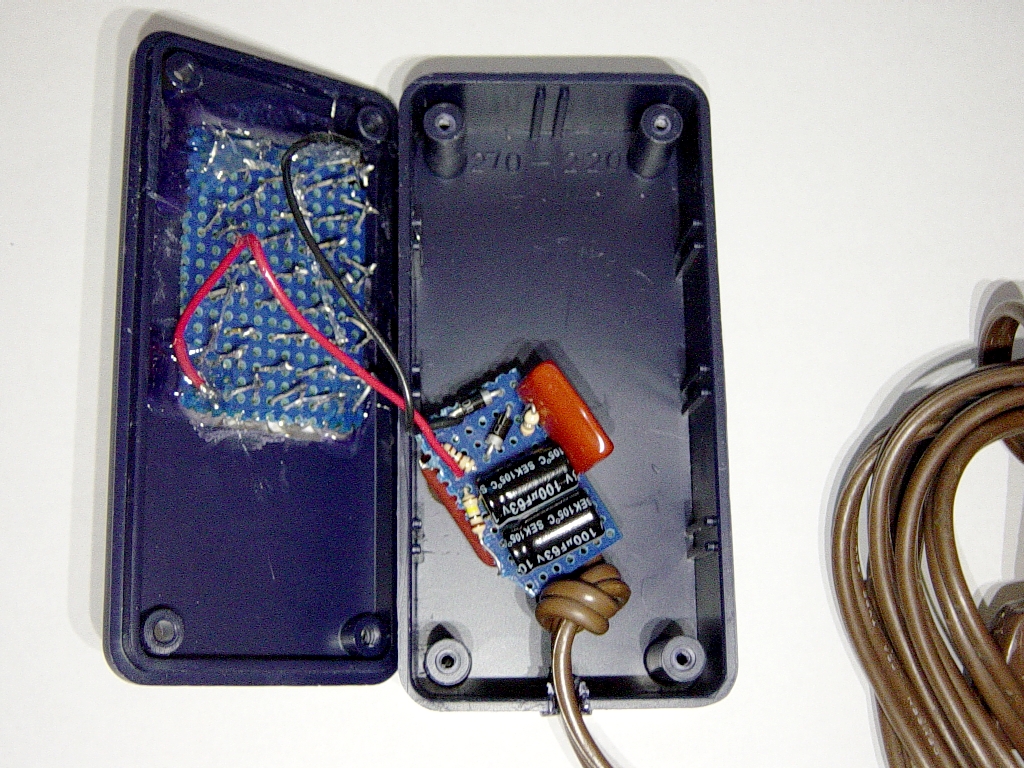
| View of the inside, with shield removed |
|---|
 |
UPDATED: 12/9/10
*** DISCLAIMERS ***
(Keep the lawyers happy.)
*ALL* Information presented here is done so without warranty or guarantee of any kind. Author assumes no responsibility for the use or inability to use this information. Author also assumes no responsibility for the ability or inability to complete the project, above. This project uses potentially *LETHAL* voltages! If you are not sure of what you're doing, ask an experienced friend to help. ALWAYS "pull the plug" and ground the caps to make sure there is *NO HIGH VOLTAGE* when working with this unit! Always keep it fully assembled, to keep hands away from dangerous voltages while it is plugged in.
This information is presented as educational information only. No guarantee is made as to its fitness for any purpose. All risk is assumed by the person who choses to use this information. While the author's experience indicates that this proceedure was effective, any attempt to build/modify these devices IS AT YOUR OWN RISK. Extreme care must always be excercised, this is at the builder's SOLE RISK.