
God Bless America!
N1NKM's Ribbon mic page 4 |
|---|
 |

HOMEBREW ribbon microphone DELTA!
Yes, folks, I have now built FOUR of these things! They keep getting BETTER, so why not?! :)
| N1NKM's Ribbon mic page 4 |
|---|
|
Yes, folks, I have now built FOUR of these things! They keep getting BETTER, so why not?! :)
I'm breaking with "tradition", here, by showing the progress in REVERSE ORDER...
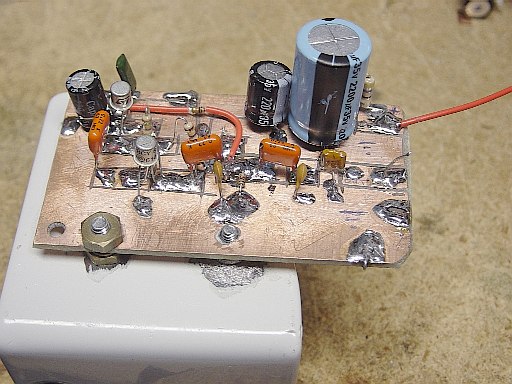
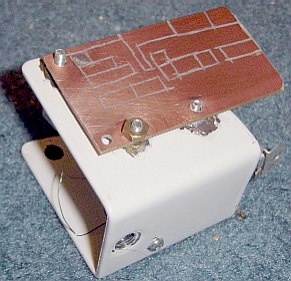
| The Delta Unit, V2.0 - Electronics view |
|---|
 |
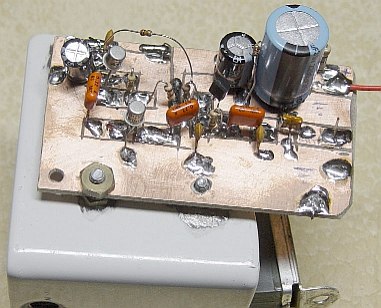
| Delta unit 1.0, with the V2.2 preamp |
|---|
 |
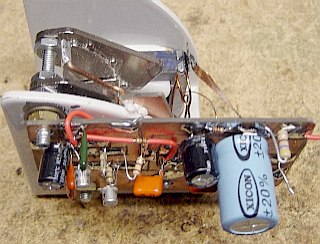
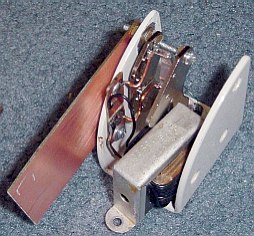
| The Delta 2, oblique view | The Delta 2, back view |
|---|---|
 |
 |
In the back view, the copper strap I use to ground the transformer frame to the preamp board is clearly visible.
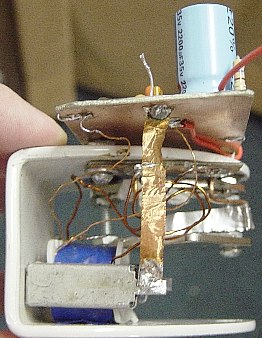
| View of the "Motor" |
|---|
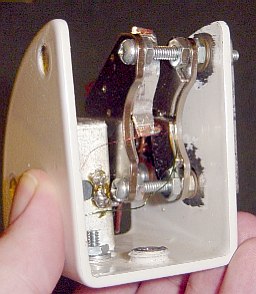 |
The white frame was salvaged from a defective computer monitor swivel-arm unit. It is solid steel, and makes a rather nice structure for a ribbon mic! Because it is ferrous, it also helps to provide some shielding against stray magnetic fields. This mic is much less sensitive to them than any of the others! As I said... "They keep getting better!"
| View of the ribbon element |
|---|
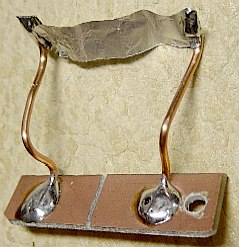 |
Jump to ribbon construction tips HERE.
With this unit, I built the ribbon element as a seperate module. Here is the Delta style ribbon assembly. This is how I will make my ribbon structures from now on! The construction is very simple - a small piece of PC board with a slice thru the copper to create two seperate foils. The board is about 1/2" wide by 1.5" long. The wires are plain copper 16ga which are attached to the board with solder. They are bent into shape, then the ribbon is attached to one side. The other is bent to meet the contact on the ribbon, then it is soldered. A hole in the board permits screwing the board to the frame.
There should be no tension on the ribbon. It needs to be slightly loose and flexible. You want the self-resonant freq to be well below 30Hz. Too much tension will raise this resonance well into the audio range, and it will sound terrible!
| Delta 1 unit frame | |
|---|---|
 | 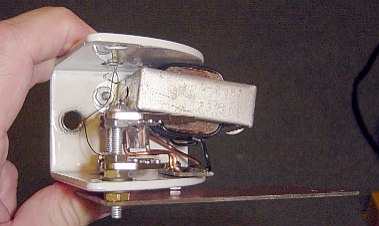 |
Here is the view of the Delta 1 unit's frame. This is showing the preamp PC board, prior to trimming and mounting of the parts. The ribbon unit's PC board and top wire support is visible here. The original transformer is also shown. It was unsatisfactory. The audio was very "muddy", probably because of too much inductance in the secondary. This transformer was originally a B+ choke salvaged from some old tube gear. It was at least several Henries. I wound a single layer coil on top of the existing coil. The fact that it worked AT ALL was a pleasant surprise. ;) Since the audio was so poor, I simply disassembled the Alpha unit and used that transformer in this one. After replacing the transformer and revising the preamp, I called this the Delta 2. Somehow, that name just sounds cool, don't you think? ;)
| The Delta preamp board, etched |
|---|
 |
| "Artwork" prior to etching |
|---|
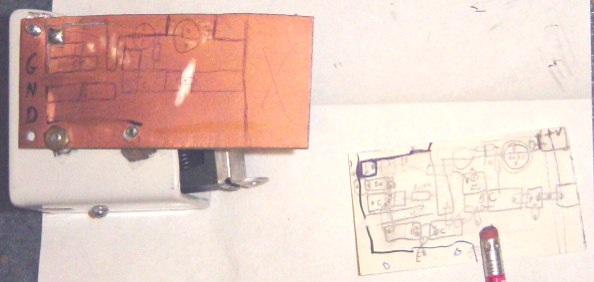 |
| Delta unit preamp schematic V3.0 |
|---|
 |
Here is the upgraded (AGAIN, 7/12/07) ribbon mic preamp. The first two stages are identical to V2.2 which I originally thought was the best preamp design! Well, now it's BETTER with one LESS stage! Even LESS noise, still PLENTY of gain, and good clean audio. Can't beat that! The former 3'rd transistor was essentially replaced by a 1K resistor to gnd between the two .22 caps. This rolls off the low frequencies nicely, allowing you to work the microphone much more closely, and not have so much "proximity effect". (Lows become unnaturally pronounced when you get too close to a ribbon mic, so this simple high-pass filter compensates for this.)
Keeping the feedback resistor definitely makes this amp a much better performer than the earlier versions!